Project Structure
This page is going to give you an idea of how the Galactic Armada project is structured. This includes the folders, resources, tools, entry point, and compilation process.
The code can be found at https://github.com/gbdev/gb-asm-tutorial/tree/master/galactic-armada.
Folder Layout
For organizational purposes, many parts of the logic are separated into reusable functions. This is to reduce duplicate code, and make logic more clear.
Here’s a basic look at how the project is structured:
Generated files should never be included in VCS repositories. It unneccessarily bloats the repo. The folders below marked with * contains assets generated from running the Makefile and are not included in the repository.
libs- Two assembly files for input and sprites are located here.srcgenerated- the results of RGBGFX are stored here. *resources- Here exist some PNGs and Aseprite files for usage with RGBGFXmain- All assembly files are located here, or in subfoldersstatesgameplay- for gameplay related filesobjects- for gameplay objects like the player, bullets, and enemies- collision - for collision among objects
story- for our story state’s related filestitle-screen- for our title screen’s related files
utils- Extra functions includes to assist with developmentmacros
dist- The final ROM file will be created here. *obj- Intermediate files from the compile process. *Makefile- used to create the final ROM file and intermediate files
Background & Sprite Resources
The following backgrounds and sprites are used in Galactic Armada:
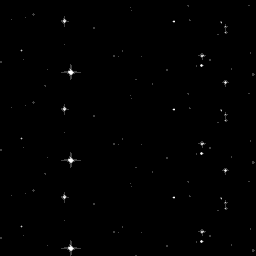
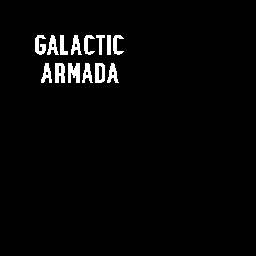
- Backgrounds
- Star Field
- Title Screen
- Text Font (Tiles only)
- Sprites
- Enemy Ship
- Player Ship
- Bullet


These images were originally created in Aseprite. The original templates are also included in the repository. They were exported as a PNG with a specific color palette. Ater being exported as a PNG, when you run make, they are converted into .2bpp and .tilemap files via the RGBDS tool: RGBGFX.
The
rgbgfxprogram converts PNG images into data suitable for display on the Game Boy and Game Boy Color, or vice-versa.The main function of
rgbgfxis to divide the input PNG into 8×8 pixel squares, convert each of those squares into 1bpp or 2bpp tile data, and save all of the tile data in a file. It also has options to generate a tile map, attribute map, and/or palette set as well; more on that and how the conversion process can be tweaked below.
RGBGFX can be found here: https://rgbds.gbdev.io/docs/v0.6.1/rgbgfx.1
We’ll use it to convert all of our graphics to .2bpp, and .tilemap formats (binary files)
NEEDED_GRAPHICS = \
	$(GENSPRITES)/player-ship.2bpp \
	$(GENSPRITES)/enemy-ship.2bpp \
	$(GENSPRITES)/bullet.2bpp \
	$(GENBACKGROUNDS)/text-font.2bpp \
	$(GENBACKGROUNDS)/star-field.tilemap \
	$(GENBACKGROUNDS)/title-screen.tilemap

# Generate sprites, ensuring the containing directories have been created.
$(GENSPRITES)/%.2bpp: $(RESSPRITES)/%.png | $(GENSPRITES)
	$(GFX) -c "#FFFFFF,#cfcfcf,#686868,#000000;" --columns -o $@ $<

# Generate background tile set, ensuring the containing directories have been created.
$(GENBACKGROUNDS)/%.2bpp: $(RESBACKGROUNDS)/%.png | $(GENBACKGROUNDS)
	$(GFX) -c "#FFFFFF,#cbcbcb,#414141,#000000;" -o $@ $<

# Generate background tile map *and* tile set, ensuring the containing directories
# have been created.
$(GENBACKGROUNDS)/%.tilemap: $(RESBACKGROUNDS)/%.png | $(GENBACKGROUNDS)
	$(GFX) -c "#FFFFFF,#cbcbcb,#414141,#000000;" \
		--tilemap $@ \
		--unique-tiles \
		-o $(GENBACKGROUNDS)/$*.2bpp \
		$<
From there, INCBIN commands are used to store reference the binary tile data.
; in src/main/states/gameplay/objects/player.asm
playerShipTileData: INCBIN "src/generated/sprites/player-ship.2bpp"
playerShipTileDataEnd:

; in src/main/states/gameplay/objects/enemies.asm
enemyShipTileData:: INCBIN "src/generated/sprites/enemy-ship.2bpp"
enemyShipTileDataEnd::

; in src/main/states/gameplay/objects/bullets.asm
bulletTileData:: INCBIN "src/generated/sprites/bullet.2bpp"
bulletTileDataEnd::
Including binary files
You probably have some graphics, level data, etc. you’d like to include. Use INCBIN to include a raw binary file as it is. If the file isn’t found in the current directory, the include-path list passed to rgbasm(1) (see the -i option) on the command line will be searched.
INCBIN "titlepic.bin"
INCBIN "sprites/hero.bin"
You can also include only part of a file with INCBIN. The example below includes 256 bytes from data.bin, starting from byte 78.
INCBIN "data.bin",78,256
The length argument is optional. If only the start position is specified, the bytes from the start position until the end of the file will be included.
Compilation
Compilation is done via a Makefile. This Makefile can be run using the make command. Make should be preinstalled on Linux and Mac systems. For Windows users, check out cygwin.
Without going over everything in detail, here’s what the Makefile does:
- Clean generated folders
- Recreate generated folders
- Convert PNGs in src/resources to
.2bpp, and.tilemapformats - Convert
.asmfiles to.o - Use the
.ofiles to build the ROM file - Apply the RGBDS “fix” utility.